WhatsApp Business Number Setup
This guide explains how to create a WhatsApp Business number in Meta Business Settings and share it with Alvio.
Before you start
Make sure your Meta business account is ready:
- Your business is verified in Meta Business Manager.
- A payment method, such as a credit card, is added to the business account.
- The phone number can receive an SMS or voice call for verification.
- The phone number is not already used by another WhatsApp or WhatsApp Business account.
Important: Meta may block number creation or activation if your business is not verified or if no payment method is attached.
1. Open Meta Business Settings
Go to business.facebook.com/settings (opens in a new tab) and select the correct business portfolio.
2. Create the WhatsApp number
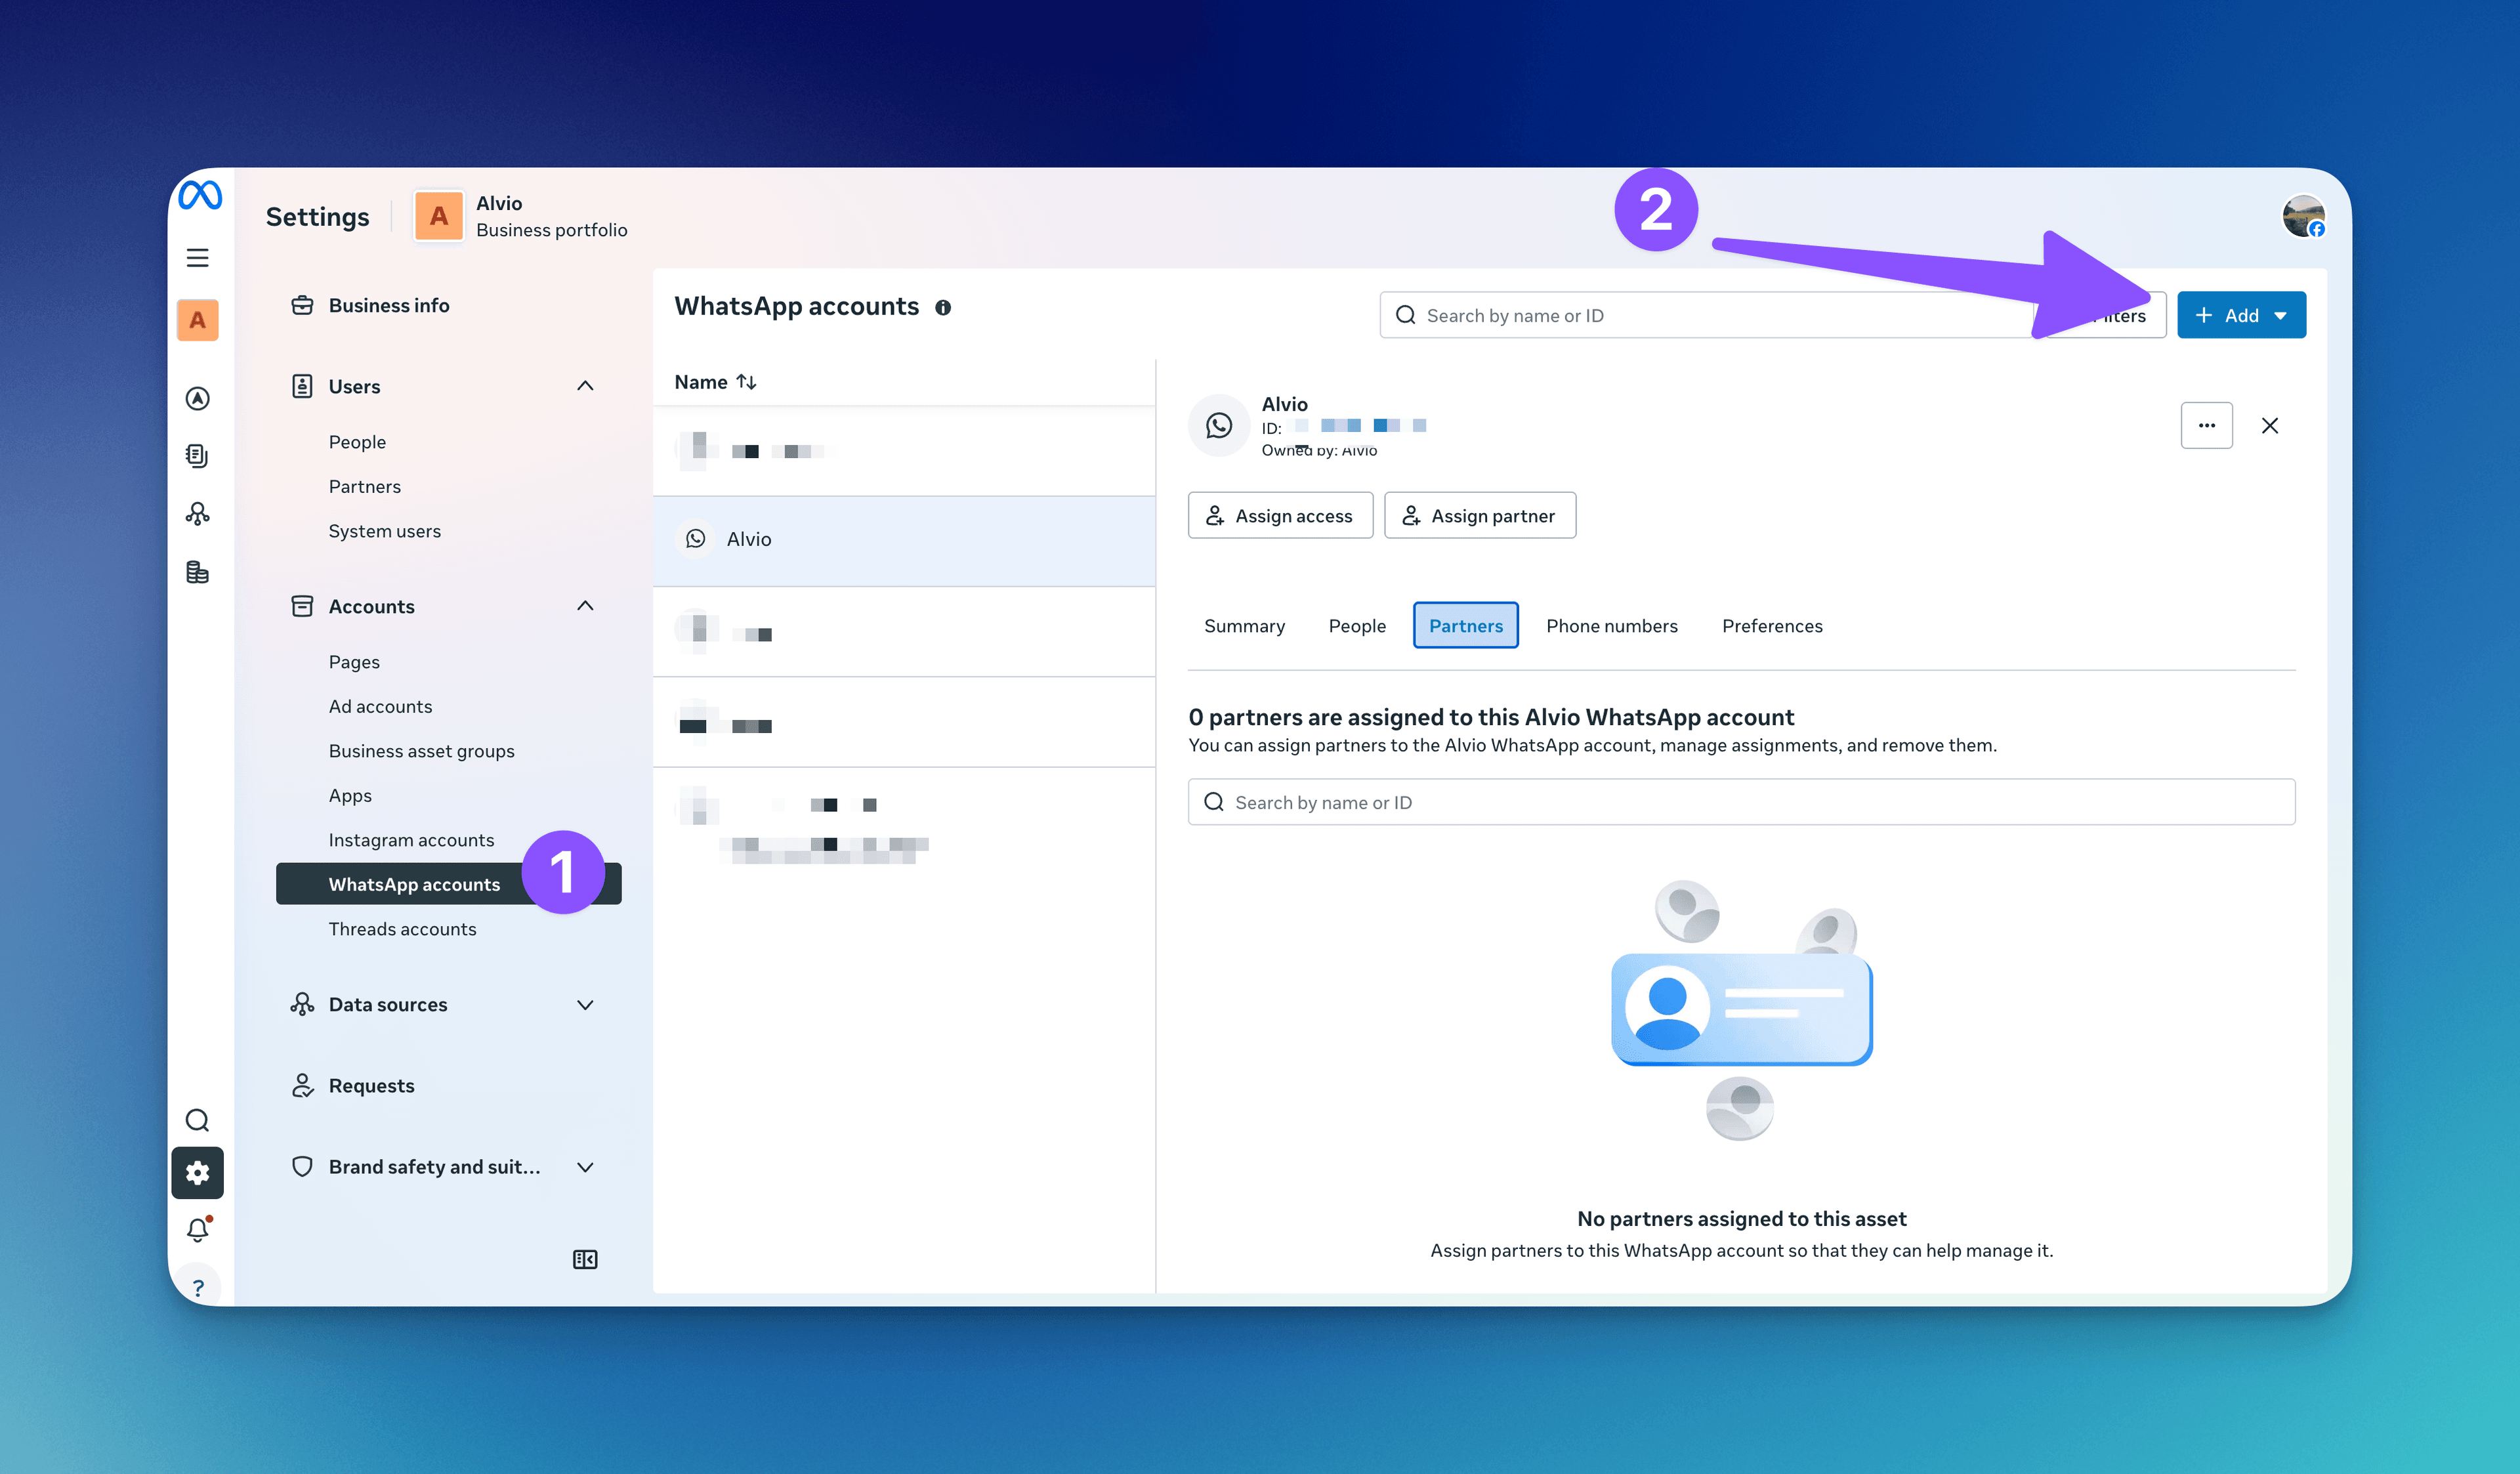
- In the left menu, open Accounts > WhatsApp accounts.
- Click Add.
- Follow Meta's steps to create or add the WhatsApp Business number.
- Enter the display name, business details, and verification code when prompted.
After verification, the number appears in your WhatsApp accounts list.
3. Share the WhatsApp account with Alvio
Once the number is created:
- Select the WhatsApp account in Accounts > WhatsApp accounts.
- Open the Partners tab.
- Click Add.
- Add Alvio as a partner using the partner business ID provided by our team.
- Grant the requested permissions so Alvio can connect and manage the WhatsApp integration.
Summary
To connect your WhatsApp number to Alvio, you only need to:
- Verify your Meta business account.
- Add a credit card or payment method.
- Create the WhatsApp Business number from Meta Business Settings (opens in a new tab).
- Share the WhatsApp account with Alvio from the Partners tab.
After that, Alvio will handle the technical integration.
Need help? Contact our support team for personalized assistance with your WhatsApp Business number setup.